
Waring Pro Waffle Maker Instruction Manual: A Comprehensive Guide
This manual details operation, safety, and maintenance for Waring Pro waffle makers (WMK Series, WAF-F20).
Explore features, troubleshooting, and warranty details for optimal waffle enjoyment.
Understanding Your Waring Pro Waffle Maker
Your Waring Pro waffle maker is designed for convenient and delicious homemade waffles. This appliance offers features like adjustable browning control, non-stick cooking surfaces, and indicator lights for optimal performance; Familiarize yourself with the different models – WMK Series and WAF-F20 – as functionalities may slightly vary.
Before first use, carefully review the safety precautions outlined in this manual to ensure safe operation. Understanding the components, from the housing to the power cord, is crucial. Proper usage extends the lifespan of your waffle maker and guarantees consistently perfect waffles. Explore the advanced features to unlock the full potential of your new kitchen appliance!
Model Numbers and Series Identification (WMK Series, WAF-F20)
Identifying your specific Waring Pro waffle maker model is essential for accessing the correct support and information. The primary series include the WMK Series and the WAF-F20. Locate the model number on the appliance’s base or within the user manual.
The WMK Series generally denotes models with advanced features, potentially including Belgian waffle settings and more precise temperature control. The WAF-F20 is a popular, reliable model known for its simplicity and consistent results. Knowing your model ensures you’re utilizing the correct settings and troubleshooting steps. Refer to Waring’s official website or contact customer service if you’re unsure of your model’s specifications.
Safety Precautions & Important Warnings
Prioritize safety when operating your Waring Pro waffle maker. Always unplug the appliance before cleaning. Never immerse the unit, cord, or plug in water or other liquids. Hot surfaces pose a burn risk – use oven mitts or handle with extreme caution.
Supervise children closely when the waffle maker is in use. Do not operate the appliance with a damaged cord or plug. Avoid using extension cords. Ensure the waffle maker is placed on a stable, heat-resistant surface away from flammable materials. Never leave the appliance unattended during operation. Improper use can result in electric shock or injury – read all instructions carefully before first use.
Component Overview: Parts List & Diagram
Your Waring Pro waffle maker consists of several key components. These include the non-stick waffle plates (top and bottom), the housing, the browning control knob, the power indicator lights, and the handle. A detailed diagram illustrates each part’s location and function.
The removable drip tray collects excess batter, simplifying cleanup. The hinged lid ensures even cooking and easy waffle removal. Familiarize yourself with each component before operation. Understanding the parts will aid in proper use, maintenance, and troubleshooting. Refer to the included diagram for visual identification of each element within your WMK Series or WAF-F20 model.
Getting Started: Initial Setup
Before your first delicious waffle, proper initial setup is crucial. Carefully unpack your Waring Pro waffle maker and remove all packaging materials. Ensure all components are present, referencing the ‘Component Overview’ section. Place the waffle maker on a stable, heat-resistant surface, away from flammable materials.
Verify the power cord is undamaged. Do not use an extension cord if possible; direct connection to a grounded outlet is recommended. Ensure the browning control knob is set to its lowest setting. Familiarize yourself with the indicator lights – they’ll signal when the unit is heating and ready for batter. Initial setup prepares your waffle maker for optimal performance and longevity.
Before First Use: Cleaning and Seasoning
Prior to creating your first waffle, a thorough cleaning and seasoning process is essential. Unplug the waffle maker and allow it to cool completely. Gently wipe down the non-stick plates with a damp, soft cloth. Avoid abrasive cleaners, as they can damage the coating. Do not immerse the unit in water.
To season the plates, lightly brush a neutral oil (vegetable or canola) onto the surface. This creates an extra layer of protection and enhances the non-stick properties. Heat the waffle maker on a low setting for a few minutes, then wipe away any excess oil. This initial seasoning prepares the plates for effortless waffle release and contributes to the longevity of your Waring Pro appliance.
Powering On & Indicator Lights Explained
To power on your Waring Pro waffle maker, simply plug the unit into a grounded electrical outlet. Most models feature indicator lights to signal operational status. A “Power” light typically illuminates when the unit is receiving electricity. A separate “Ready” light indicates when the waffle maker has reached the desired temperature and is prepared for batter.
Some models may include additional lights for specific functions, like browning level selection. Refer to your model’s specific diagram for light interpretations. If the “Ready” light doesn’t illuminate, ensure the unit is properly plugged in and the browning control is set. Never attempt to force the lid open while the unit is heating or the “Ready” light is on.
Operating Instructions: Making Perfect Waffles
Once the “Ready” light illuminates, your Waring Pro waffle maker is preheated and ready for batter. Carefully open the lid. Using a measuring cup, pour the recommended amount of batter onto the lower grid, avoiding overfilling which can cause overflow. Close the lid gently; do not force it.
Cooking time varies depending on your desired browning level and the waffle maker model. Typically, waffles are ready in 3-5 minutes. Avoid opening the lid prematurely, as this can disrupt the cooking process. When the “Ready” light illuminates again, your waffle is complete. Carefully remove the waffle with a non-metallic utensil to prevent scratching the non-stick surface.
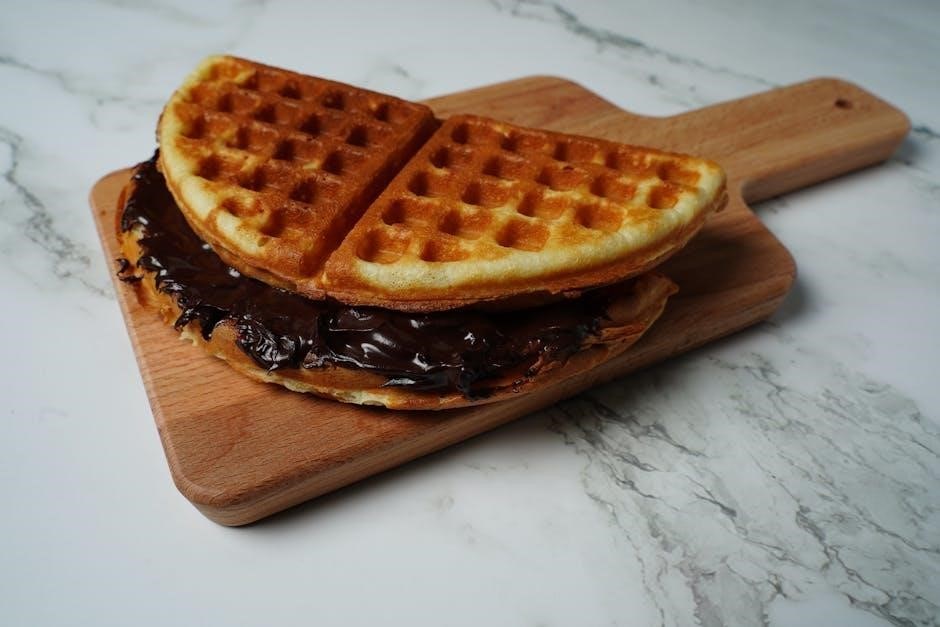
Recipe Suggestions: Basic Waffle Batter
For a classic waffle experience, try this simple recipe: Combine 1 ½ cups all-purpose flour, 3 ½ teaspoons baking powder, 1 teaspoon salt, and 1 tablespoon sugar in a large bowl. In a separate bowl, whisk together 1 ¼ cups milk, 1 egg, and 3 tablespoons melted butter.
Gradually add the wet ingredients to the dry ingredients, mixing until just combined – avoid overmixing. A few lumps are okay! For a richer flavor, substitute buttermilk for milk. Experiment with extracts like vanilla or almond for added aroma. This batter is suitable for both Belgian and traditional waffle settings on your Waring Pro waffle maker. Adjust batter quantity based on your model’s grid size.
Adjusting Browning Control Settings
Your Waring Pro waffle maker features adjustable browning control for personalized results. Typically, settings range from 1 (lightest) to 6 (darkest). Start with setting 3 or 4 for a golden-brown waffle and adjust accordingly.
Higher settings yield crispier, darker waffles, while lower settings produce lighter, softer waffles. Consider the batter type – richer batters may require lower settings to prevent burning. Monitor the first waffle closely to determine the optimal setting for your preference and the specific batter used. Remember that preheating time also influences browning; a fully preheated waffle maker browns more quickly.
Pouring Batter & Closing the Lid
Once the waffle maker is preheated and the indicator light signals readiness, carefully pour the batter onto the lower grid. Use the measuring cup (if provided) for consistent results. Avoid overfilling; excess batter will spill when the lid is closed.
Generally, a batter amount covering approximately 70-80% of the grid is sufficient. Immediately close the lid – do not hesitate, as this initiates the cooking process. Avoid pressing down on the lid, as this can compress the waffle and affect its texture. Allow the waffle maker to cook undisturbed until the indicator light changes or a beep sounds, signaling completion.
Cleaning & Maintenance
Regular cleaning ensures optimal performance and longevity of your Waring Pro waffle maker. Always unplug the appliance and allow it to cool completely before cleaning. Wipe the exterior with a damp cloth; avoid abrasive cleaners. The non-stick grids require gentle cleaning – use a soft brush or cloth to remove any batter residue.
Avoid metal utensils that can damage the non-stick coating. For stubborn residue, a slightly damp cloth with mild dish soap can be used. Ensure no water enters the internal components. Proper maintenance extends the life of your waffle maker and guarantees consistently delicious results. Store in a cool, dry place when not in use.
Cooling Down & Unplugging Procedures
Always prioritize safety when finishing with your Waring Pro waffle maker. After each use, turn the power off and allow the appliance to cool down completely before attempting any cleaning or storage. This prevents burns and potential damage to the unit. Never immerse the waffle maker in water while it’s still hot.
Once cooled, carefully unplug the waffle maker from the electrical outlet; Avoid pulling on the cord; grasp the plug itself. Store the appliance in a safe, dry location, away from children and flammable materials. Proper cooling and unplugging procedures are crucial for safe operation and extending the lifespan of your Waring Pro waffle maker.
Non-Stick Surface Care & Cleaning Solutions
Maintaining the non-stick coating is vital for optimal performance and longevity of your Waring Pro waffle maker. After each use, allow the unit to cool completely. Gently wipe the plates with a soft cloth or paper towel to remove excess batter. Avoid abrasive cleaners, scouring pads, or metal utensils, as these can damage the non-stick surface.
For stubborn residue, a slightly damp cloth with mild dish soap can be used. Ensure no water enters the internal components. Dry thoroughly before storing. Specialized non-stick surface cleaners are also available. Regular, gentle cleaning preserves the non-stick properties, ensuring easy waffle release and preventing sticking.
Dishwasher Safety: Which Parts Are Safe?
Determining dishwasher safety for your Waring Pro waffle maker components is crucial for preventing damage. Generally, removable drip trays and batter cups (if applicable to your model – WMK Series, WAF-F20) are top-rack dishwasher safe. However, never place the waffle plates themselves, the main housing unit, or the electrical cord in the dishwasher.
The intense heat and moisture can compromise the non-stick coating and electrical components. Handwashing these parts with mild soap and a soft sponge is recommended. Always ensure all parts are completely dry before reassembling and storing. Refer to your specific model’s documentation for definitive dishwasher safety guidelines.
Troubleshooting Common Issues
Encountering problems with your Waring Pro waffle maker (WMK Series, WAF-F20)? This section addresses frequent concerns. If the unit isn’t heating, check the power cord and outlet. For waffles sticking, ensure proper seasoning and sufficient browning control. An indicator light failing to illuminate may signal a power issue or internal malfunction.
Before seeking repair, verify the unit is correctly assembled and the batter isn’t overfilled. If issues persist, consult the ‘Waffle Maker Not Heating’ or ‘Waffles Sticking’ sections for detailed solutions. Never attempt to disassemble the unit beyond removable parts; contact Waring customer support for complex problems.
Waffle Maker Not Heating: Possible Causes
If your Waring Pro waffle maker (WMK Series, WAF-F20) isn’t heating, several factors could be at play. First, confirm the unit is securely plugged into a functioning electrical outlet. Test the outlet with another appliance to rule out a power supply issue. Inspect the power cord for any visible damage – frays or cuts could indicate a fault.
Next, verify the indicator lights are illuminating, suggesting the unit is receiving power. If not, the heating element itself may have failed. Do not attempt to repair the heating element yourself; contact Waring customer service. Ensure the browning control isn’t set to its lowest setting, as this might appear as ‘not heating’.
Waffles Sticking: Solutions & Prevention
Experiencing waffles sticking to your Waring Pro (WMK Series, WAF-F20)? Proper preparation is key! Ensure the waffle maker is adequately preheated; the indicator light should signal readiness. A well-seasoned non-stick surface is crucial – see the ‘Before First Use’ section for seasoning instructions. Using sufficient cooking spray or a light brushing of melted butter before pouring batter creates a barrier.
Avoid opening the lid prematurely. Allow the waffle to cook fully, indicated by the steam diminishing and the waffle appearing golden brown. Do not use metal utensils, as they can damage the non-stick coating. If sticking persists, gently loosen the waffle with a nylon or wooden utensil.
Indicator Light Problems: What Do They Mean?
Understanding your Waring Pro (WMK Series, WAF-F20) indicator light is vital for safe and effective operation. A consistently lit light typically signifies the unit is heating. If the light doesn’t illuminate, check the power connection and ensure the outlet is functioning. A rapidly blinking light may indicate a temperature fluctuation or sensor issue – unplug and allow to cool before restarting.
If the light cycles on and off during operation, this is normal, maintaining the set temperature. However, erratic or unusual blinking patterns could signal a malfunction. If problems persist, consult the ‘Troubleshooting’ section or contact Waring Customer Service. Never attempt to disassemble or repair the unit yourself.
Advanced Features & Tips
Unlock the full potential of your Waring Pro (WMK Series, WAF-F20) waffle maker with these advanced techniques! Explore the difference between Belgian waffle and traditional settings – Belgian offers thicker, deeper pockets. Mastering batter consistency is key; a slightly thicker batter yields crispier results. Experiment with adding extracts or spices to your batter for unique flavor profiles.

For even browning, ensure batter is evenly distributed. Pro Tip: Lightly oiling the plates (even with non-stick models) can enhance release and crispness. Don’t overcrowd the waffle maker; follow recipe guidelines for optimal results. Regularly cleaning ensures longevity and peak performance.
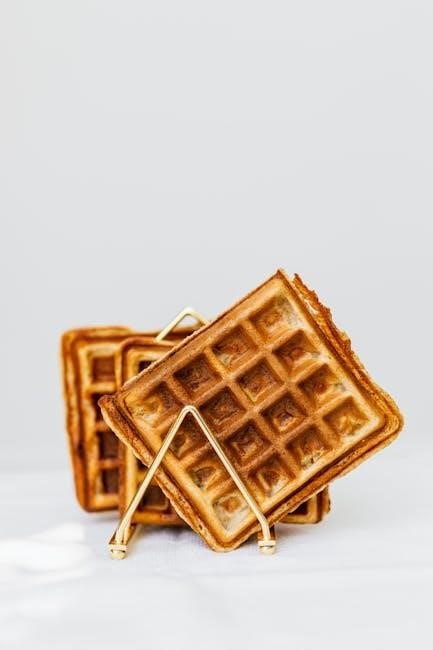
Belgian Waffle vs. Traditional Waffle Settings
Your Waring Pro (WMK Series, WAF-F20) waffle maker likely features settings for both Belgian and traditional waffles. Understanding the difference is crucial for achieving desired results. Belgian waffles utilize deeper grids, requiring more batter to create a thick, fluffy texture with large pockets – perfect for generous toppings.
Traditional waffle settings employ shallower grids, producing thinner, crispier waffles. Adjust batter consistency accordingly; Belgian waffles benefit from a slightly thicker batter to prevent spreading. Experiment with both settings to discover your preference! Remember: Cooking times may vary between settings, so monitor closely for golden-brown perfection.
Batter Consistency & Waffle Texture Control
Achieving the perfect waffle texture hinges on batter consistency. For fluffy waffles, avoid overmixing – a few lumps are desirable! Overmixing develops gluten, resulting in tougher waffles. A slightly thinner batter generally yields crispier results, while a thicker batter creates softer, chewier waffles.
Experiment with liquid ratios to fine-tune the texture. Adding a touch of melted butter or oil enhances crispness. Your Waring Pro (WMK Series, WAF-F20) responds well to adjustments. Observe how different consistencies interact with the waffle maker’s grids. Remember, the ideal batter is a balance between lightness and structure, ensuring a delightful waffle experience.
Warranty Information & Customer Support
Your Waring Pro Waffle Maker (WMK Series, WAF-F20) is covered by a limited warranty against defects in materials and workmanship; The warranty period typically begins from the date of original purchase. Please retain your proof of purchase for warranty claims. The warranty does not cover damage resulting from misuse, accidents, or unauthorized repairs.
For warranty service or customer support, contact Waring Customer Service. Details, including phone numbers and email addresses, are available in this manual and on the Waring website. We are committed to ensuring your satisfaction. Registering your appliance online streamlines the support process. Replacement parts and additional assistance are readily available through Waring’s dedicated support channels.
Registering Your Waring Pro Waffle Maker
Registering your Waring Pro Waffle Maker (WMK Series, WAF-F20) offers several benefits, enhancing your ownership experience. Registration allows Waring to efficiently process warranty claims, provide timely product updates, and offer exclusive promotions. It also facilitates quicker customer support should you encounter any issues.
To register, visit the official Waring website and locate the product registration section. You will need your model number, serial number (found on the appliance), and proof of purchase. The process is quick and straightforward. Registering demonstrates your ownership and ensures access to all available support resources. It’s a simple step towards a seamless waffle-making journey!
Contacting Waring Customer Service
Should you require assistance with your Waring Pro Waffle Maker (WMK Series, WAF-F20), Waring’s dedicated customer service team is readily available. They can address questions regarding operation, troubleshooting, warranty claims, or replacement parts.
You can reach Waring Customer Service via several channels: their official website features a comprehensive FAQ section and a contact form. Alternatively, you can call their toll-free number during business hours. Ensure you have your model and serial number handy when contacting support. Prompt and helpful assistance is their priority, ensuring a positive experience with your appliance. Detailed contact information is available on Waring’s website.
Finding Replacement Parts
Maintaining your Waring Pro Waffle Maker (WMK Series, WAF-F20) often requires replacing worn or damaged parts. Waring offers a variety of genuine replacement components to ensure continued optimal performance and safety.
Replacement parts, such as non-stick plates, drip trays, and control knobs, can be purchased directly through Waring’s official website. Authorized retailers and appliance parts suppliers also stock these components. Always use genuine Waring parts to avoid compatibility issues and maintain warranty validity. When ordering, have your model number readily available. Proper part replacement extends the lifespan of your waffle maker and guarantees consistently delicious results. Detailed parts diagrams are available online.