The Honeywell Home T6 Pro TH6320U2008 is a Wi-Fi-enabled, 7-day programmable thermostat offering precise temperature control, energy efficiency, and smart home integration with voice command functionality.
1.1 Overview of the Thermostat and Its Features
The Honeywell Home T6 Pro TH6320U2008 is a cutting-edge, Wi-Fi-enabled programmable thermostat designed for compatibility with various HVAC systems. It features a user-friendly interface, voice control via Amazon Alexa and Google Assistant, and seamless integration with the Honeywell Home app. The thermostat includes a UWP mounting system, decorative cover plate, and energy-saving capabilities, making it an ideal choice for modern smart homes.
1.2 Importance of the Installation Manual
The installation manual for the Honeywell Home T6 Pro TH6320U2008 is essential for ensuring proper setup and functionality. It provides step-by-step instructions, compatibility checks, and wiring diagrams, helping users avoid errors. The manual also covers advanced features like Wi-Fi setup and voice control configuration. Following the guide ensures safety, efficiency, and optimal performance, making it a critical resource for both novice and experienced installers.
Pre-Installation Requirements and Preparation
Ensure compatibility with your HVAC system, gather essential tools, and verify package contents. Understanding these steps ensures a smooth and successful installation process.
2.1 Compatibility Check for HVAC Systems
Verify compatibility of the Honeywell Home T6 Pro TH6320U2008 with your HVAC system. It supports conventional, heat pump, and dual-fuel systems. Ensure proper wiring configuration matches your system type. Incorrect installation may damage equipment or void warranty. Refer to the manual or contact Honeywell support for system compatibility confirmation.
2.2 Tools and Materials Needed for Installation
The installation requires basic tools: a screwdriver (Phillips and flathead), drill with 7/32″ bit, wall anchors, and a hammer. Additional materials include the UWP mounting system, decorative cover plate, screws, and 2 AA batteries. Ensure all components from the package are available before starting. Refer to the manual for specific wiring and mounting instructions to ensure a smooth setup process.
2.3 Understanding the Package Contents
The Honeywell Home T6 Pro TH6320U2008 package includes the T6 Pro Thermostat, UWP Mounting System, decorative cover plate, screws, wall anchors, 2 AA batteries, and installation instructions. Ensure all items are present before starting the installation. The UWP Mounting System simplifies wall mounting, while the decorative cover plate helps conceal any paint gaps from previous installations, ensuring a clean finish.
Step-by-Step Installation Guide
Follow the detailed instructions to install your Honeywell Home T6 Pro TH6320U2008 thermostat, including removing the old unit, mounting the UWP system, and connecting wires. Refer to the wiring diagram and setup guide for a seamless installation process.
3.1 Removing the Old Thermostat
Before removing the old thermostat, take a photo of the wiring for reference. Switch off the power at the circuit breaker. Carefully disconnect and label each wire. Gently pull the thermostat away from the wall, taking note of any additional components like a mercury switch. Store the old thermostat safely, ensuring no damage occurs during removal. Refer to the manual for specific instructions.
3.2 Mounting the UWP System
Mount the UWP (Universal Wall Plate) system by locating wall studs or drilling 7/32-inch holes for drywall. Insert wall anchors and attach the plate using screws. Ensure the plate is level and aligned with the wiring area. Secure firmly to the wall, ensuring proper fit and stability for the thermostat. This step ensures a clean and professional installation, hiding any gaps from the previous thermostat.
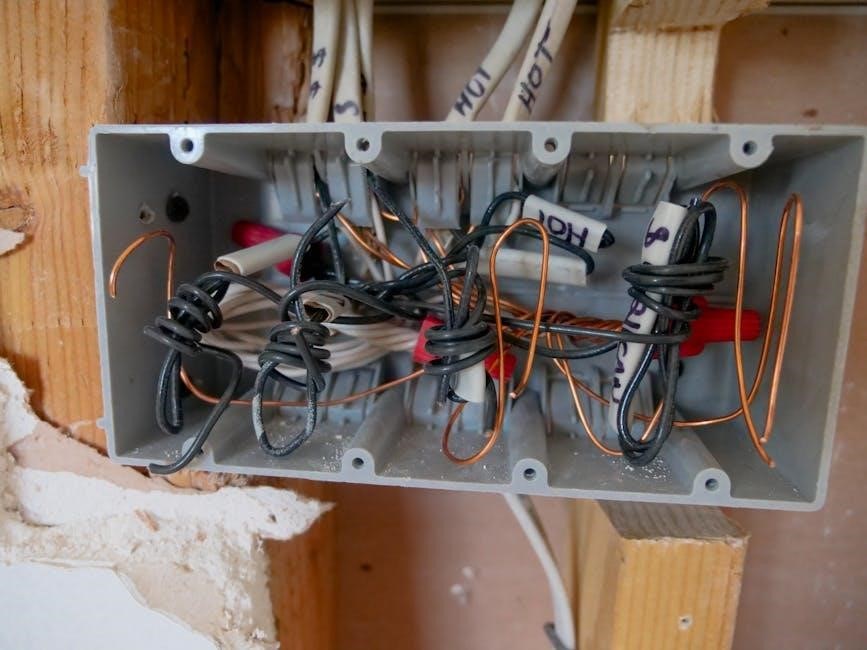
3.3 Connecting the Wires According to the Wiring Diagram
Refer to the wiring diagram to connect the thermostat wires accurately. Match the labeled wires (R, Rh, Rc, W, Y, G, O, B, C) to the appropriate terminals on the UWP system. For conventional systems, connect R to R, W to W, and Y to Y. For heat pumps, ensure the O/B wire is correctly configured. Secure all connections tightly and double-check for accuracy before proceeding.
3.4 Securing the Thermostat to the Wall
Drill holes at the marked positions and gently tap the provided wall anchors into place. Mount the thermostat over the anchors, ensuring it is level. Secure the device firmly using the screws provided. Make sure the thermostat is tightly fastened to the wall to prevent any movement or instability. Double-check the alignment and tighten all screws properly for a sturdy installation.
Advanced Setup and Configuration
Configure Wi-Fi connectivity, set up the Installer Setup Menu (ISU), and enable voice control with Amazon Alexa or Google Assistant for smart home integration.
4.1 Setting Up Wi-Fi Connectivity
To set up Wi-Fi connectivity for the Honeywell Home T6 Pro TH6320U2008, download the Honeywell Home app, select the thermostat model, and choose your home network. Enter the Wi-Fi password when prompted, and follow in-app instructions to complete the connection. Ensure the thermostat is powered on and in pairing mode for a successful setup. Once connected, you can control the thermostat remotely via the app.
4.2 Configuring the Installer Setup Menu (ISU)
The Installer Setup Menu (ISU) allows advanced configuration of the thermostat. Access the menu by navigating through the settings, selecting “Installer” or “Advanced,” and entering the installer code if required. Configure options like temperature differential, heat pump settings, and system operation modes. Ensure settings match your HVAC system for optimal performance. Refer to the manual for detailed parameter descriptions and compatibility with your specific system type.
4.3 Enabling Voice Control with Smart Home Systems
The Honeywell Home T6 Pro TH6320U2008 is compatible with Amazon Alexa and Google Assistant, enabling voice control. To set this up, link your Honeywell Home account with your preferred smart home platform. Ensure the thermostat is connected to Wi-Fi and follow the app instructions to complete the integration. Voice commands allow seamless temperature adjustments and smart home automation, enhancing convenience and control.
Troubleshooting Common Issues
Identify common issues like wiring problems, connectivity loss, or display malfunctions. Refer to the manual for diagnostic steps and solutions. Ensure proper connections and restart the device if needed.
5.1 Diagnosing Wiring Problems
Ensure correct wiring by referring to the thermostat’s wiring diagram. Check for loose connections and verify terminal assignments match your HVAC system. For heat pumps, avoid using the G terminal. Confirm 24VAC power is present at the R and C terminals. If issues persist, consult the manual’s troubleshooting guide or reset the thermostat by removing batteries for 30 seconds.
5.2 Resolving Connectivity Issues
To resolve connectivity issues, ensure your thermostat is connected to a stable 2.4 GHz Wi-Fi network. Restart your router and thermostat, then reconfigure Wi-Fi settings through the menu. Verify network strength and check for firmware updates. If issues persist, reset the thermostat by removing batteries for 30 seconds and retry the setup process using the Honeywell Home app.
5.3 Addressing Display or Sensor Malfunctions
If the display is dim or unresponsive, check brightness settings or clean the screen with a soft cloth. For sensor issues, ensure proper placement and clean any debris. Reset the thermostat by removing batteries for 30 seconds. Verify temperature readings using the Honeywell Home app. If problems persist, update firmware or contact Honeywell support for further assistance or replacement options.
Maintenance and Upkeep
Regular maintenance ensures optimal performance. Clean the thermostat with a soft cloth, replace batteries annually, and update firmware for enhanced functionality and efficiency.
6.1 Cleaning the Thermostat
Regularly clean the Honeywell Home T6 Pro TH6320U2008 thermostat using a soft, dry cloth to remove dust and dirt. Avoid harsh chemicals or liquids, as they may damage the device. Gently wipe the screen and exterior to ensure proper functionality. Cleaning helps maintain optimal performance and prevents malfunctions. This simple maintenance step is crucial for preserving the thermostat’s display clarity and sensor accuracy over time.
6.2 Replacing Batteries
The Honeywell Home T6 Pro TH6320U2008 thermostat uses 2 AA batteries, included in the package. To replace them, turn off power at the circuit breaker, remove the thermostat from the wall, and open the battery compartment. Insert new batteries with correct polarity. Reattach the thermostat and restore power. Replace batteries annually or when the low-battery indicator appears to ensure continuous operation without interruptions.
6.3 Updating Software Firmware
Regular firmware updates ensure optimal performance and new features for your Honeywell Home T6 Pro TH6320U2008 thermostat. Connect the thermostat to Wi-Fi and open the Honeywell Home app. Navigate to the settings menu, select ” Firmware Update,” and follow prompts to download and install the latest version. The update process is automatic, and the thermostat will reboot once complete to apply changes. Always ensure a stable internet connection during updates to prevent interruptions.
Additional Resources and Support
Access the full installation manual PDF online or contact Honeywell customer support for assistance. Visit Resideo for troubleshooting guides and FAQs.
7.1 Accessing the Full Installation Manual PDF
The Honeywell Home T6 Pro TH6320U2008 installation manual PDF is available for free download from platforms like ManualsLib and Manualzz. It includes detailed installation steps, wiring diagrams, and advanced setup options. Users can also access it through Resideo’s official website or Honeywell’s support page. The PDF is compatible with multiple devices and provides comprehensive guidance for a smooth setup process.
7.2 Contacting Honeywell Customer Support
Honeywell Customer Support can be reached for assistance with installation, troubleshooting, or product inquiries. Visit their official website or call toll-free at 1-800-468-1502 for direct support. Additionally, online resources, including FAQs and troubleshooting guides, are available to help resolve common issues and provide detailed product information.
7.3 Online Communities and Forums for Troubleshooting
Online communities and forums provide valuable resources for troubleshooting the Honeywell Home T6 Pro TH6320U2008 thermostat. Websites like ManualsLib and Resideo’s support page offer access to user manuals, troubleshooting guides, and FAQs. Additionally, forums such as Honeywell’s official community allow users to share experiences, ask questions, and receive advice from experienced users and experts, helping to resolve common issues efficiently.
The Honeywell Home T6 Pro TH6320U2008 thermostat offers efficient temperature control and smart home integration, making it a reliable choice for modern homes, as detailed in the manual.
8.1 Summary of Key Installation Steps
Key installation steps include removing the old thermostat, mounting the UWP system, connecting wires according to the wiring diagram, securing the thermostat to the wall, and setting up Wi-Fi connectivity. Ensure compatibility, prepare tools, and follow the provided manual for a smooth setup. Proper installation ensures optimal performance and energy efficiency, as outlined in the Honeywell Home T6 Pro TH6320U2008 manual.
8.2 Final Tips for Optimal Thermostat Performance
- Regularly clean the thermostat to ensure accurate temperature readings.
- Replace batteries as needed to maintain consistent performance.
- Update firmware periodically for enhanced features and bug fixes.
- Ensure proper wiring connections to avoid malfunctions.
- Set up Wi-Fi connectivity correctly for remote control and smart home integration.