
A radial arm saw table enhances woodworking efficiency by providing a stable platform for precise cuts. Plans and PDFs offer detailed blueprints for constructing custom tables tailored to specific needs, ensuring durability and versatility in various projects.
1.1 What is a Radial Arm Saw Table?
A radial arm saw table is a specialized workstation designed to house and support a radial arm saw, providing stability and precision for woodworking projects. It typically features a sturdy base, a flat table surface, and an adjustable fence to guide materials accurately. The table allows for efficient crosscuts, rip cuts, and angled cuts, making it versatile for various woodworking tasks. By mounting the radial arm saw on the table, users gain better control over the tool, enhancing both safety and cutting performance. A well-built radial arm saw table is essential for professionals and DIY enthusiasts seeking to improve their woodworking efficiency and accuracy. Proper construction ensures durability and adaptability to different project requirements. It is a cornerstone tool in many workshops, offering reliable service for years with proper maintenance.
1.2 Importance of Using a Radial Arm Saw Table
Using a radial arm saw table significantly enhances woodworking safety, precision, and efficiency. It provides a stable platform for the saw, reducing vibrations and ensuring accurate cuts. The table’s design allows for better control over materials, minimizing the risk of accidents and improving overall performance. Additionally, it enables versatile cutting operations, such as crosscuts, rip cuts, and angled cuts, making it indispensable for diverse woodworking projects. A well-constructed radial arm saw table also prolongs the lifespan of the saw by preventing wear and tear. Its durability and adaptability make it a valuable investment for both professionals and hobbyists, ensuring consistent results and ease of maintenance. Incorporating a radial arm saw table into a workshop elevates the quality and efficiency of woodworking tasks.
1.3 Benefits of Building Your Own Radial Arm Saw Table
Building your own radial arm saw table offers numerous benefits, including cost savings, customization, and the ability to tailor the design to your specific woodworking needs. By constructing it yourself, you can ensure durability and precision, as you can choose high-quality materials and craftsmanship. This project also allows you to gain hands-on experience with woodworking and engineering, enhancing your DIY skills. Additionally, a custom-built table can be designed to fit your workspace perfectly, optimizing efficiency and workflow. It also grants you the freedom to incorporate unique features or modifications that commercial tables may lack. Finally, building your own radial arm saw table provides a sense of accomplishment and the knowledge that your creation will last for years, supporting your woodworking projects with reliability and performance.

Understanding Radial Arm Saw Table Plans and PDFs
Radial arm saw table plans and PDFs provide detailed instructions for constructing custom tables, ensuring accuracy and precision. These resources offer step-by-step guides, material lists, and diagrams to help you build a durable and functional table tailored to your woodworking needs, enhancing your workshop’s efficiency and productivity.
2.1 What to Look for in a Radial Arm Saw Table Plan
When selecting a radial arm saw table plan, prioritize features like precise measurements, durable materials, and compatibility with your saw model. Ensure the plan includes a detailed parts list, clear assembly instructions, and safety guidelines. Look for customization options, such as adjustable fences or storage compartments, to enhance functionality. Verify that the design accommodates your workspace and project requirements. Additionally, check for reviews or ratings to ensure the plan is reliable and user-friendly. A well-structured plan will guide you through the construction process, ensuring a sturdy and efficient table for your woodworking projects.
2.2 How to Choose the Right Plan for Your Needs
Choosing the right radial arm saw table plan involves assessing your specific woodworking requirements. Consider the size of your projects, the tools you already own, and the space available in your workshop. Ensure the plan aligns with your skill level, as some designs may require advanced woodworking techniques. Look for plans that include customizable features, such as adjustable fences or storage compartments, to maximize functionality. Budget is also a key factor, so select materials and designs that fit within your financial constraints. Additionally, verify that the plan is compatible with your radial arm saw model and any additional accessories you plan to use. By evaluating these factors, you can select a plan that meets your needs and enhances your woodworking efficiency.

2.3 The Role of PDFs in Radial Arm Saw Table Plans
PDFs play a crucial role in providing detailed and organized radial arm saw table plans. They offer a universal format that maintains document consistency across devices, ensuring measurements and instructions remain clear. PDFs typically include high-resolution diagrams, step-by-step guides, and material lists, making them indispensable for accurate construction. Their portability allows easy access on tablets or smartphones during the build process. Many PDF plans are designed to be printable, enabling users to have a physical reference in the workshop. Additionally, PDFs often include bonus content, such as cutting lists and tool checklists, enhancing the overall building experience. Their reliability and comprehensive nature make PDFs a preferred choice for woodworking enthusiasts seeking precise and professional guidance.

Safety Considerations When Building a Radial Arm Saw Table
Ensure proper use of protective gear, maintain a clean workspace, and follow power tool safety guidelines to minimize risks during construction and operation of the table.
3.1 General Safety Guidelines for Woodworking Projects
When working on woodworking projects like building a radial arm saw table, prioritize safety to prevent accidents. Always wear protective gear, including safety glasses, ear protection, and a dust mask. Ensure loose clothing or jewelry is secured to avoid entanglement with tools. Keep the workspace clean and well-lit to minimize tripping hazards and improve visibility. Use proper lifting techniques to avoid strain or injury. Familiarize yourself with tool operation manuals and maintain sharp, well-aligned blades for precise cuts. Never reach over moving blades, and keep children and pets away from the work area. Regularly inspect tools and equipment for damage or wear. Proper ventilation is essential when working with wood to reduce dust and fume exposure. Stay focused and avoid fatigue, as it can lead to careless mistakes. Always unplug tools during maintenance or when not in use. These guidelines form a foundation for safe woodworking practices.
3.2 Specific Safety Tips for Radial Arm Saw Tables
When working with radial arm saw tables, ensure the saw arm remains parallel to the workpiece to prevent binding or kickback. Always maintain proper blade alignment and keep the blade at the correct height for the material. Use hold-downs or featherboards to secure the workpiece firmly, reducing the risk of kickback. Avoid overreaching or standing in an unsafe position relative to the saw. Keep the table and surrounding area clear of debris to maintain control. Use the correct blade type for the material being cut to minimize vibration and improve safety. Regularly inspect the saw arm and bearings for wear, ensuring smooth operation. Never attempt to cut materials that are too large or unwieldy for the table’s capacity. Always keep your hands away from the blade path during operation. These specific tips enhance safety when working with radial arm saw tables.
3.3 Common Mistakes to Avoid During Construction
One of the most common mistakes when building a radial arm saw table is improper alignment of the saw arm, which can lead to inaccurate cuts. Ensure the arm is parallel to the table and securely fastened. Another error is using lightweight materials that compromise stability, resulting in vibration and uneven cuts. Always opt for sturdy, durable materials. Incorrect measurements during assembly can also cause misalignment and poor performance, so double-check all cuts and fittings. Neglecting to add proper reinforcements, such as trusses or braces, can weaken the table’s structure. Additionally, deviating from the plan without understanding the consequences can lead to functional issues. Finally, rushing the assembly process increases the risk of errors. Take your time to ensure each component is correctly aligned and securely attached for optimal performance and safety.
Materials and Tools Required for the Project
Building a radial arm saw table requires materials like sturdy plywood, steel framing, and hardware. Essential tools include a drill, wrench, saw, and measuring tape for precise assembly.
4.1 List of Materials Needed for the Radial Arm Saw Table
To build a radial arm saw table, you’ll need a variety of materials. Start with a durable table top, typically made of 3/4-inch plywood or medium-density fiberboard (MDF). The base and frame require sturdy steel framing, such as 2×2 or 2×3 steel tubing, for stability. Wood screws, bolts, and brackets are essential for assembly. Additional materials include caster wheels for mobility, a reinforced support system, and a protective coating like polyurethane for the tabletop. Ensure you have the radial arm saw itself, as well as mounting hardware to secure it to the table. All these components are readily available at hardware stores or home improvement retailers, making it easy to gather everything needed for the project.
4.2 Essential Tools for Building the Table
Building a radial arm saw table requires a set of essential tools to ensure accuracy and efficiency. A circular saw or handheld saw is necessary for cutting lumber to size. A drill press or cordless drill is needed for drilling precise holes and driving screws. An impact driver or screwdriver will help secure bolts and fasteners. Measuring tools like a tape measure, square, and level are crucial for ensuring proper alignment and even surfaces; Clamps are essential for holding pieces in place during assembly. Safety gear, such as safety glasses and a dust mask, should always be worn. Additional tools like a wrench or socket set may be required for specific hardware. Having these tools on hand will streamline the construction process and help achieve professional-grade results.
4.3 Additional Tools and Accessories for Enhanced Functionality
To enhance the functionality of your radial arm saw table, consider adding specialized tools and accessories. A router or edge guide can help with precise edge cuts and jointing. A jigsaw or bandsaw may be useful for curved or irregular cuts. Sanding tools, such as a belt sander or orbital sander, can be integrated for smoothing surfaces. Accessories like a featherboard or hold-down clamps improve stability during cuts. A digital measuring system or laser guide can boost accuracy; Dust collection accessories, such as a vacuum adapter or dust port, keep your workspace clean. Optional additions like a table extension or auxiliary fence provide extra support for larger projects. These tools and accessories can elevate your radial arm saw table from basic to highly functional, catering to advanced woodworking needs and improving overall performance.
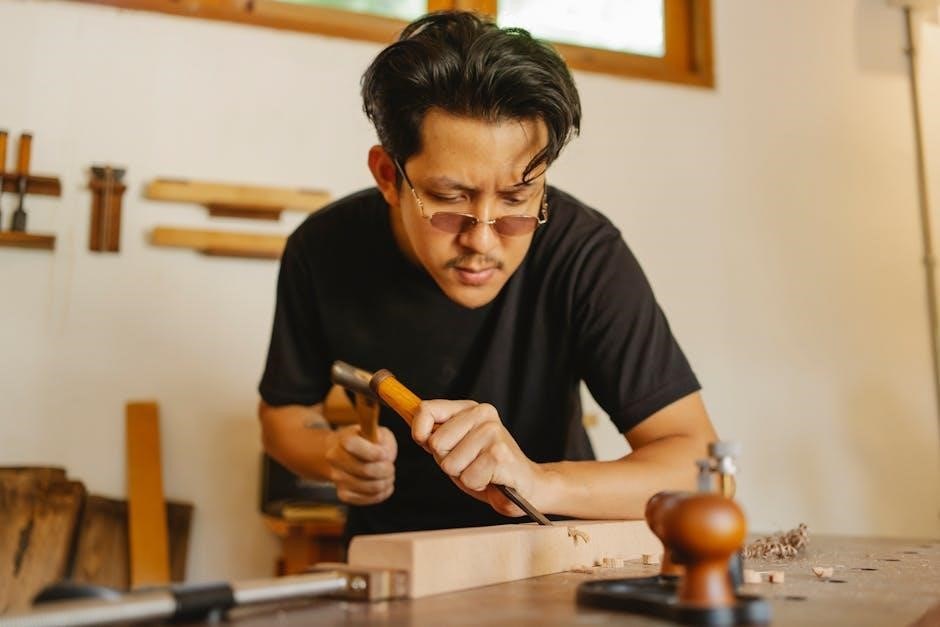
Step-by-Step Construction of the Radial Arm Saw Table
Constructing the radial arm saw table involves planning, material preparation, and precise assembly. Follow detailed plans to build the table top, base, and supports. Ensure accurate alignment and secure installation of the radial arm saw, testing each component for stability and functionality before final assembly.
5.1 Preparing the Workspace and Tools
Begin by clearing and organizing your workspace to ensure safety and efficiency. Gather all necessary tools and materials as outlined in your radial arm saw table plans PDF. Inspect and sharpen tools like saws, drills, and sanders to ensure optimal performance. Lay out materials such as lumber, screws, and bolts in an accessible manner. Wear personal protective equipment, including safety glasses and a dust mask, to protect yourself during construction. Double-check that all power tools are in good working condition and properly calibrated. Finally, review your plans to understand the sequence of steps and identify any potential challenges. A well-prepared workspace and tools are essential for a smooth and successful project. Proper organization reduces errors and saves time, allowing you to focus on building a durable and functional radial arm saw table.
5.2 Building the Table Top and Base

Start by constructing the table top using durable materials like plywood or medium-density fiberboard (MDF), ensuring it is large enough to accommodate your radial arm saw and projects. Cut the top to the specified dimensions in your radial arm saw table plans PDF. Next, build the base using sturdy lumber or steel, ensuring it is rigid and level. Attach the base to the table top using bolts or screws, making sure the connection is secure. Sand all surfaces to remove splinters and ensure a smooth finish. Double-check the alignment and stability of the table, as any imbalance can affect the accuracy of cuts. Properly assembling the table top and base provides a solid foundation for the entire project, ensuring safety and precision during operation.
5.3 Assembling the Main Components of the Table
Once the table top and base are ready, begin assembling the main components. Attach the radial arm saw to the table top using the mounting hardware provided with the saw or specified in your radial arm saw table plans PDF. Ensure the saw is aligned with the center of the table and secured tightly using bolts. Next, connect the arm to the saw, making sure it moves smoothly and is properly balanced. Use a torque wrench to tighten all connections firmly, following the manufacturer’s guidelines. Double-check the alignment to ensure accurate cuts. Finally, attach any additional supports or brackets to reinforce the assembly. A sturdy and precise connection between the saw and table is critical for safe and efficient operation, so take your time to ensure everything is properly aligned and secured.
5.4 Installing the Radial Arm Saw
Installing the radial arm saw is a critical step that requires precision and care. Begin by positioning the saw on the table top, ensuring it aligns with the pre-drilled mounting holes. Use the hardware provided with the saw or specified in your radial arm saw table plans PDF to secure it firmly. Tighten the bolts gradually to avoid misalignment, ensuring the saw sits level and plumb. Double-check the manufacturer’s guidelines for torque specifications to prevent over-tightening. Once installed, test the saw’s movement by sliding the arm back and forth to ensure smooth operation. Make any necessary adjustments to the alignment or balance for optimal performance. Proper installation is essential for safety and accuracy, so take your time to get it right.
5.5 Adding Supports and Reinforcements
Adding supports and reinforcements is essential to ensure the radial arm saw table’s stability and durability. Begin by identifying areas prone to stress, such as the table top and saw arm. Install additional bracing, like steel brackets or wooden beams, to reinforce these sections. Use high-strength fasteners to secure the supports firmly. Consider adding a torsion box or rigid frame under the table top for extra rigidity. Ensure all joints are tightly sealed and evenly spaced to distribute weight evenly. For added stability, attach anti-vibration pads to the base. Finally, test the table’s sturdiness by applying moderate pressure and checking for any movement. Proper supports and reinforcements will enhance the table’s performance and longevity, making it safer to use for heavy-duty projects.
5.6 Final Assembly and Testing
Once all components are built and reinforced, proceed to the final assembly. Carefully attach the radial arm saw to the table, ensuring proper alignment with the miter slot. Secure all bolts and fasteners tightly, following the manufacturer’s torque specifications. Double-check that the saw arm moves smoothly and the table is level. Plug in the saw and perform test cuts on scrap wood to verify accuracy and power. Inspect for any vibrations or wobbling, making adjustments as needed. Ensure all safety features, such as guards and stops, are functioning correctly. If everything operates smoothly, the table is ready for use. This final step ensures your radial arm saw table is safe, efficient, and ready to handle various woodworking projects with precision.
Customizing Your Radial Arm Saw Table
Customize your radial arm saw table to enhance functionality and personalization. Add adjustable fences, stops, and dust collection systems for improved performance and workshop organization.
6.1 Adding Adjustable Fences and Stops
Adding adjustable fences and stops to your radial arm saw table enhances precision and versatility. Fences provide consistent guidance for straight cuts, while stops allow for repeatable measurements. Use durable materials like steel or aluminum for the fences and stops to ensure longevity. Install them securely, ensuring they can be easily adjusted for different project requirements. Adjustable fences and stops are particularly useful for rip cuts, crosscuts, and mitered edges. They also improve safety by keeping your workpiece stable during cutting. Consider adding micro-adjustment features for fine-tuning. These upgrades make your radial arm saw table more efficient and adaptable for various woodworking tasks. Detailed instructions for installation are often included in radial arm saw table plans PDFs.
6.2 Incorporating Dust Collection Systems

Incorporating dust collection systems into your radial arm saw table is essential for maintaining a clean and safe workspace. A properly designed dust collection system captures sawdust and debris, reducing airborne particles and improving visibility during cuts. Start by installing a dust port that aligns with your radial arm saw’s dust outlet. Connect it to a vacuum or central dust collection system for efficient removal of waste. Ensure the system is airtight to maximize suction power. Adding a dust collection system not only enhances workshop safety but also reduces cleanup time. Many radial arm saw table plans PDFs include detailed instructions for integrating dust collection, ensuring a seamless and functional setup. This upgrade is a practical way to improve your woodworking experience.
6.3 Custom Storage Solutions for Tools and Accessories
Custom storage solutions are a fantastic way to optimize your radial arm saw table’s functionality. Built-in drawers, shelves, or compartments can keep tools and accessories organized and within easy reach. Consider adding specific holders for saw blades, wrenches, and push sticks to maintain a clutter-free workspace. Many radial arm saw table plans PDFs include designs for integrated storage, allowing you to tailor the setup to your needs. By incorporating custom storage, you enhance efficiency and safety, ensuring that essential items are readily accessible. This feature is particularly useful for woodworking projects that require multiple tools and accessories. With proper planning, your radial arm saw table can become a central hub for your workshop, combining practicality with convenience.

6.4 Upgrading the Table for Enhanced Performance
Upgrading your radial arm saw table can significantly enhance its performance and versatility. Consider adding a more powerful motor or improving the blade guidance system for smoother cuts. Installing adjustable fences or featherboards can boost accuracy and safety. Additionally, integrating a dust collection system minimizes debris and improves visibility. Upgrading the table surface to a high-quality, durable material, such as cast iron, enhances stability and reduces vibration. Some radial arm saw table plans PDFs include optional upgrades like motorized feeds or precision alignments. These enhancements not only prolong the table’s lifespan but also expand its capabilities for complex woodworking projects. By investing in strategic upgrades, you can tailor the table to meet your specific needs and achieve professional-grade results.

Maintenance and Care of the Radial Arm Saw Table
Regularly clean dust and debris from the table and saw. Lubricate moving parts to ensure smooth operation. Inspect for wear and tear, and align the saw periodically. Always protect the table from moisture to prevent rust or warping. Proper maintenance ensures optimal performance and longevity of the radial arm saw table.
7.1 Regular Maintenance Tasks to Keep the Table in Good Condition
Regular maintenance is crucial to ensure the longevity and performance of your radial arm saw table. Start by dusting the table surface and saw arm with a soft brush or compressed air to remove debris. Check for any wear or tear on the arm, hinges, and bearings, and replace worn parts promptly. Align the saw blade with the fence periodically to maintain accuracy. Protect the table from moisture by applying a rust-inhibiting coating. Tighten all bolts and screws to prevent loosening over time. Finally, store the table in a dry, clean environment when not in use. Consistent upkeep ensures reliable operation and extends the table’s lifespan.
7.2 Cleaning and Lubricating the Radial Arm Saw
Cleaning and lubricating the radial arm saw are essential for optimal performance and longevity. Start by turning off the saw and unplugging it for safety. Use a wire brush to remove sawdust and debris from the blade and arm. Wipe the arm and table with a soft cloth to eliminate dust and residue. Apply a silicone-based spray or machine oil to the arm’s pivot points, bearings, and hinges to reduce friction. Avoid using WD-40, as it can attract dust. Clean the blade regularly to prevent rust and ensure accurate cuts. Lubricate moving parts every 50 hours of use or when you notice increased resistance. Proper cleaning and lubrication prevent corrosion and wear, ensuring smooth operation and precise results.
7.3 Troubleshooting Common Issues with the Table

Identifying and addressing issues with your radial arm saw table is crucial for maintaining functionality. Common problems include a wobbling table, misaligned fence, or uneven cuts. A wobbly table may result from an uneven base or loose bolts; tighten all hardware and ensure the table is level. Misalignment of the fence or blade can cause inaccurate cuts; adjust the fence to parallel the blade and check the arm’s alignment. Dust collection issues often arise from clogged ports or poor suction; clean the system regularly. Addressing these problems promptly ensures precise cuts and extends the table’s lifespan. Regular inspections and adjustments prevent minor issues from becoming major problems, keeping your radial arm saw table in optimal working condition.
Resources and Support for Building a Radial Arm Saw Table
Access detailed radial arm saw table plans PDFs online, join woodworking forums for advice, and consult professionals for tailored guidance to ensure a successful project.
8.1 Where to Find Reliable Radial Arm Saw Table Plans PDFs
Reliable radial arm saw table plans PDFs can be found on woodworking websites, online marketplaces, and forums. Websites like Etsy and eBay offer detailed plans for purchase. Specialized woodworking sites provide free or paid downloadable PDFs. Additionally, woodworking communities and forums often share user-created plans. Ensure the plans include detailed measurements, step-by-step instructions, and material lists. Look for reviews or ratings to verify reliability. Many plans are designed by experienced woodworkers, ensuring accuracy and practicality. Previewing the PDF before purchase is recommended to confirm it meets your needs. These resources provide a wide range of designs, from basic to complex, catering to different skill levels. Choose a plan that aligns with your project goals for a successful build.
8.2 Online Communities and Forums for Woodworking Enthusiasts
Online communities and forums are invaluable resources for woodworking enthusiasts seeking advice, sharing ideas, and troubleshooting projects. Platforms like Reddit’s r/woodworking and Woodworking Talk offer spaces to discuss radial arm saw table plans and techniques. These forums are populated by experienced woodworkers who provide tips, answer questions, and share their own projects. Websites like The Sawdust Zone and LumberJocks also host active communities where members can showcase their work and learn from others. Additionally, specialized forums focused on power tools often include discussions about radial arm saws and table setups. Engaging with these communities can help refine your skills, solve problems, and gain inspiration for your radial arm saw table project. They are excellent resources for both beginners and seasoned woodworkers.
8.3 Professional Help and Consultation Options
For those seeking expert guidance, professional help and consultation options are available to ensure success with radial arm saw table plans. Local woodworking shops or hardware stores often employ experienced professionals who can offer tailored advice and hands-on demonstrations. Certified contractors or carpenters specializing in custom woodworking can also provide detailed plans and construction support. Additionally, online platforms like JustAnswer or Upwork connect users with woodworking experts for remote consultations. These professionals can review your plans, troubleshoot issues, and offer tips for improvement. Some community colleges or vocational schools with woodworking programs may also provide consultation services or host workshops. Investing in professional guidance can enhance your project’s quality and safety, especially if you’re unsure about specific aspects of the design or construction process.